

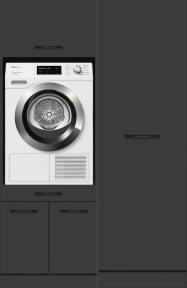
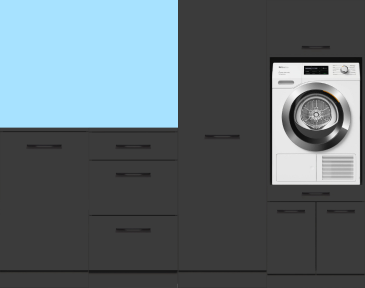
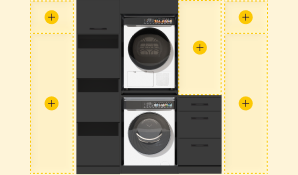
A washing machine cabinet only fits perfectly if you measure exactly what the space and your appliances require. With this practical guide, you measure correctly in one go, avoid surprises during installation, and immediately choose the right configuration for your laundry space. Grab a tape measure and notepad and follow the steps. Want extra support while measuring? Check the step-by-step guide for measuring and installation.
What exactly do you need to measure?
Note all dimensions and considerations that determine the fit for your washing machine cabinet. Always measure in multiple places and do not round off. For space planning, clearance zones, and ergonomic heights, find extra guidelines in Setting up laundry space: dimensions and layout.
- Width, depth, and height of the available niche or wall section.
- Ceiling height and any beams or coves.
- Baseboard or plinth height and depth along the wall.
- Connection points: position of water tap, drain, electricity, and any mechanical ventilation.
- Door and walking space: door swing radius, washing machine hatch, aisle width.
- Wall squareness and whether the floor is level.
- Sloped walls or roof pitch: measure lowest and highest point.
- Appliance size per machine: width, depth including hose, height, and required clearance.
Step-by-step plan: how to measure your laundry space
- Clear the space - Put away loose items and make sure you can reach everywhere.
- Measure the width - Measure left, center, and right. Note the smallest measurement as usable niche width.
- Measure the depth - Wall to front. Check top and bottom. Note obstacles such as radiators or baseboards.
- Measure the height - Floor to ceiling at at least three points. For sloped roofs, also measure the usable height at cabinet depth.
- Record connection points - Measure from the left wall: position of water tap, drain, and power outlet in height and width.
- Check your appliances - Measure the current width/depth/height of the washing machine and dryer, including protruding door and hoses.
- Calculate clearance - Reserve space around appliances and behind the cabinet for ventilation and hoses. See the table below.
Tip: Installing only one appliance? Consult the Single series dimensions for the correct clearance and height.
Minimum clearance and guideline dimensions
Use the guidelines below to determine if your measurements are sufficient. More space is usually better, as long as the cabinet can stand stable.
| Component | Recommended clearance/guideline dimension | Why |
|---|---|---|
| Side clearance per appliance | 5 - 10 mm per side | Sliding in and out, vibration clearance |
| Rear space for appliances | 30 - 50 mm | Hoses, plug, ventilation |
| Free height above appliance | 20 - 30 mm | Vibration and placement |
| Baseboard/plinth cutout | Baseboard height and depth + 5 mm | Place cabinet flush against the wall |
| Door or walking space for cabinet | 60 - 90 cm | Drawers, maintenance, ergonomics |
| Niche width vs. cabinet | +5 - 10 mm total | Leveling and tolerance |
Layout and arrangement: impact on your measurements
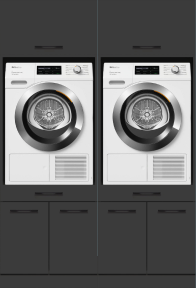
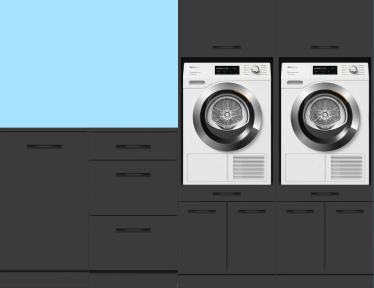
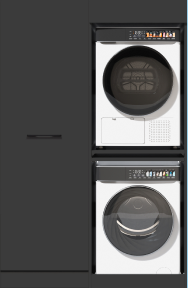
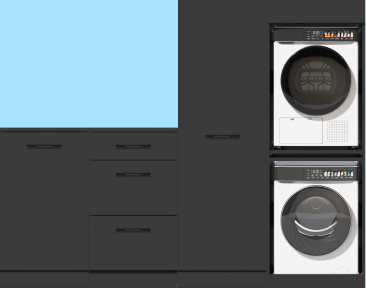
If you choose stacking or side-by-side, your critical dimensions will shift. When stacking, the required width is compact, but the total height is decisive and the floor must be stable. Check ceiling height and space for opening the washing machine door. Want to stack? See the guideline dimensions and ventilation space per size in the Stacking series. Side-by-side, width is decisive. Calculate device width x2 plus side clearance and a countertop or cabinet depth that allows hoses without kinks. If you choose side-by-side, you’ll find width and niche dimensions per setup in the Double series. Want extra storage with drawers or doors? Reserve extra depth for fronts and hinge clearance. Also consider the door swing direction of your washing machine and any cabinet doors so everything can open freely without hitting the wall or a radiator.
Common measurement mistakes and how to avoid them
- Measure in only one spot - Measure at multiple heights and take the smallest measurement.
- Forgot baseboards - Note the baseboard height and depth and choose a cabinet with a baseboard cutout.
- No space behind the cabinet - Allow 30 - 50 mm for hoses and cables.
- Underestimating sloped roofs - Measure the usable height at cabinet depth, not just the maximum ridge height.
- Door push and walking space - Allow at least 60 cm of free space for standing and moving.
- Uneven floor - Plan adjustable feet and check levelness across the full width.
Done measuring? Here’s how to use the Wasdroom configurator
With your measurements at hand, you can easily assemble your washing machine cabinet in the Wasdroom configurator. Choose the series - Single, Double, or Stack - enter niche width, height, and depth, and select layouts such as shelves or drawers. The cabinets are TÜV-certified, made from melamine-coated fiberboard, and support up to 240 kg (Double) or 120 kg (Single and Stack), ensuring your washer and dryer stand safely. Thanks to plug-and-play assembly and clear instructions, you can install quickly and neatly. If you’re unsure between two sizes, choose the smaller cabinet size with enough clearance around your appliances.
Frequently Asked Questions
How do I measure a washing machine cabinet under a sloping wall?
Measure the usable height at the cabinet depth. Mark the intended cabinet depth from the wall and measure the height to the ceiling there. Check at multiple points and use the smallest measurement as a guide.
Does a 60 cm washing machine always fit in a 60 cm cabinet?
Not always. Many machines are slightly wider due to edges or vibrate lightly during operation. Allow 5 - 10 mm side clearance and 30 - 50 mm rear space. Measure your appliance including protruding parts.
Should I consider vibration and noise when measuring?
Yes. Allow some clearance all around and check that the floor is stable and level. An anti-vibration mat can help but does not replace correct measurements or alignment.
What do I do if my connection points are exactly behind a cabinet wall?
Plan the cabinet so that a service hatch or free zone is available behind the appliance. Allow at least 30 mm of rear space and preferably do not place the power outlet directly behind the appliance.
Ready to start with your new laundry room? With the right measurements, you can immediately configure a washing machine cabinet in the Wasdroom configurator that fits your space and appliances.
Leave a comment
This site is protected by hCaptcha and the hCaptcha Privacy Policy and Terms of Service apply.